I am pleased with this new version. I had put off the upgrade, because given how much time I invested into getting 18.04 to work like I wanted it to, I feared upgrading would break everything: my conda environments, hibernation script, gnome tweaks, login lock-screen, Nvidia-smi, tensorflow, etc. You name it. Actually, upgrading went a lot smoother than I expected. But, in the words of Illyrio Mopatis:
In this blog post, I want to document the short roller coaster that was upgrading Ubuntu to 20.04 and highlight some of the cool features that I like that weren’t part of 16.04 and 18.04.
The Process
Using the GUI
Following this guide from the official Ubuntu website, I decided I to use the GUI. After all, for small software updates, I prefer the using the GUI over the command line.
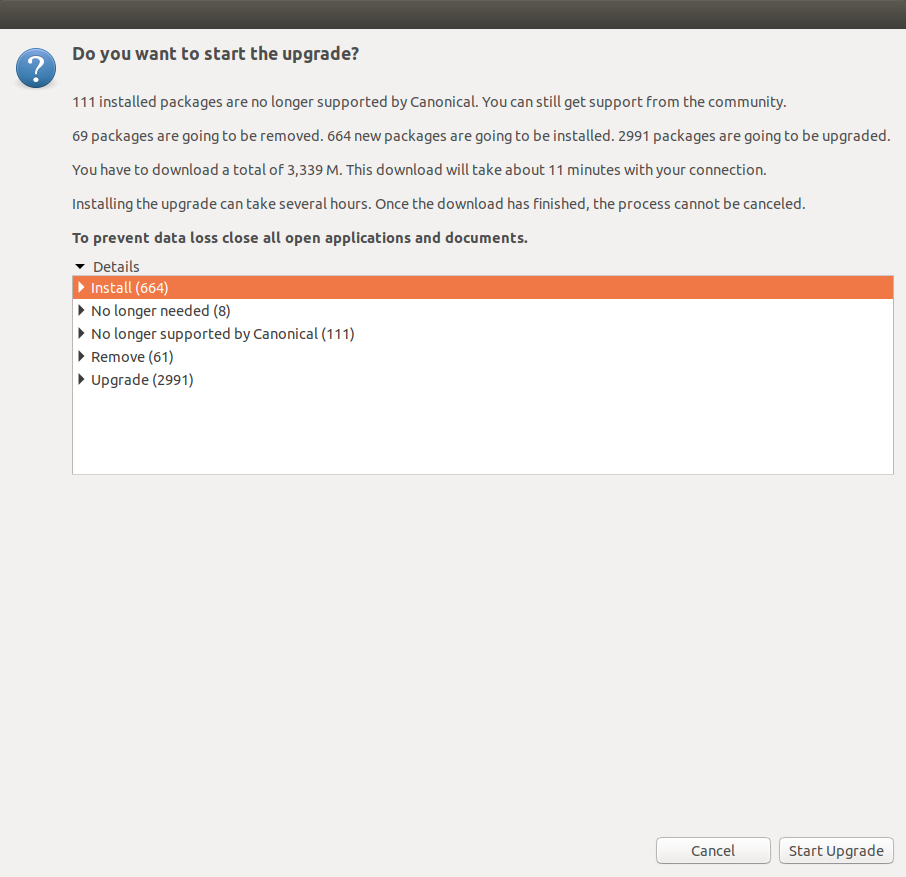
This was mistake #1. As soon as the upgrade started, clicking was disabled. About 10 minutes into the upgrade dialog popped up asking me if I wanted to keep my version, keep the package maintainer’s version, show the difference, etc. I couldn’t click, so I couldn’t even see which file it was talking about, because the dialog covered the terminal display. I used the arrow buttons to try and select the option to keep the package maintainer’s version, but as soon as I pressed enter, I realized I had selected the default: to keep my version. Oops! But the GUI kept chugging along, so I figured maybe it was okay, until it wasn’t…
Failed Upgrade and File-system Check
Halfway through, the upgrade suddenly aborted, reverted some changes, and then my machine shut down. Iirc, it said something about lightdm not being configured properly, which I suspect was either because I chose not to overwrite one of the configuration files, or because xscreensaver was still active, even though I thought I had disabled it before the upgrade. I didn’t have time to take a picture of the error message. Upon booting, I got this message:
(initramfs): /dev/nvme0n1p8 contains a file system with errors, check forced.
  Inodes that were a part of a corrupted orphan linked lost found.
  /dev/nvme0n1p8 : UNEXPECTED INCONSISTENCY; RUN fsck manually.(I.e .,
  without -a or -p options). fsck exited with status code 4. The root
  filesystem on /dev/nvme0n1p8 requires a manual fsck
I’ve seen this a couple times. Basically, it happens whenever the power is cut off as the system is writing to disk. The first time I ever saw this message, I thought my hard drive was dying, and I would lose a lot of data. Nothing of the sort happened, and I’ve come to accept this as a regular annoyance from using Linux. The fix is simple, just do the file-system check manually using fsck -yf /dev/nvme0n1p8 and the corrupted file will automatically be removed.
Login Loop
After completing the manual fsck, I reached what was supposed to be a login screen, except it wasn’t. Instead, the login screen kept switching back and forth between a blank screen and a terminal, as described here. I literally could not get into the terminal. Whenever I pressed Ctrl+Alt+F1 or Ctrl+Alt+F6, a second later it would switch away. I turned off my computer and rebooted in recovery mode.
When booting in recovery mode, there’s an option to “drop to the root shell prompt”. Great, now I had access to the terminal! According to this guide, the fix should be pretty simple: just use apt --fix-broken install and all will be well, right? Nope! Instead, I got the following error message:
Can not upgrade: An upgrade from 'focal' to 'bionic' is not supported with this tool.
I also tried sudo dpkg --configure -a and sudo apt upgrade, but this didn’t fix the login loop issue.
Completing the Upgrade
Finally after about half an hour of thinking I’ve lost my machine for good, in frustration, I mashed Ctrl+Alt+ any button from F1 to F6, and somehow, Ctrl+Alt+F3 got me to a terminal that didn’t switch away immediately! Incredible! There is supposed to be no difference between the terminals, and yet there is! Having reached the terminal, I saw:
Ubuntu 20.04.2 LTS harrisonized tty6
This was comforting. I guess the upgrade did work after all. In addition to this message, I also got several lines of error messages like:
sysetmd-journald: Failed to write entry
and:
npm update check failed
Try running with sudo or get access
to the local update config store via
sudo chwon -R $USER:$(id -gu $USER) /home/harrisonized/.config
I simply ignored these and executed apt--fix-broken install, sudo dpkg --configure -a, and sudo apt upgrade. After doing this twice, the upgrade was successful. I rebooted and was able to actually reach the login screen! My machine was saved!
The New New
Immediately, I noticed that the new login screen was much cleaner. Prior to the upgrade, I was using slick-greeter, the default login screen for Ubuntu MATE. However, the new login screen for 20.04 looks significantly nicer than the login screen for 18.04, so I decided to keep it.
After logging in, the first thing I noticed that the desktop buttons are actually snapped to a grid! This is groundbreaking; my desktop immediately felt cleaner than ever before! Additionally, in the top right hand corner was an NVIDIA indicator, much like the one in Ubuntu MATE! When I clicked on it, I noticed the additional on-demand option:
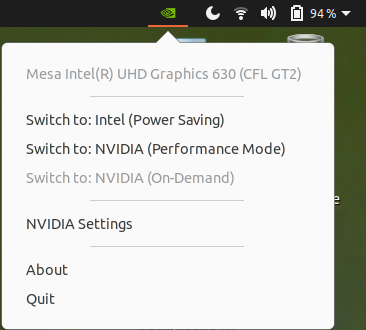
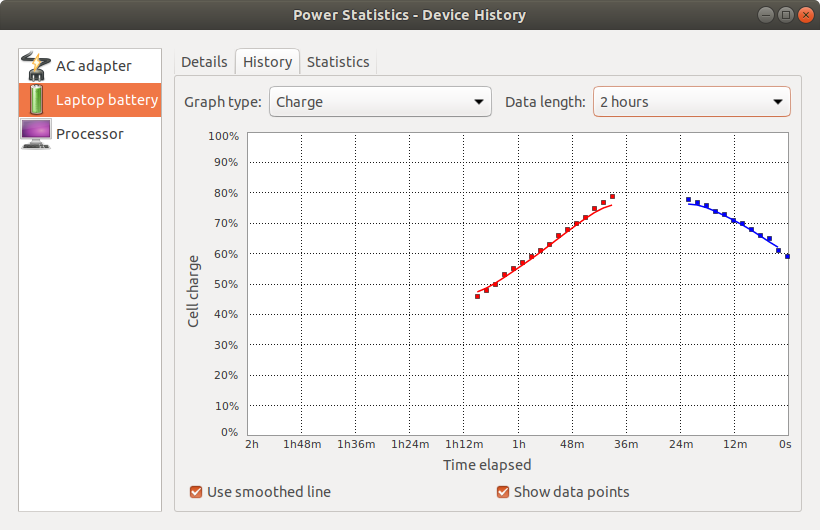
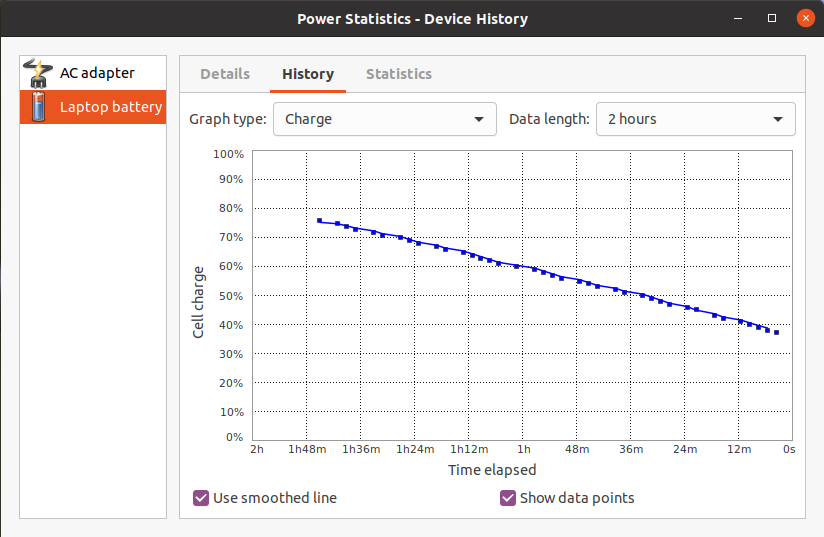
This is great! Performance Mode was extremely power hungry, claiming 1%/min, and I made sure to turn it off whenever I didn’t need the GPU for machine learning. With On-Demand, the power consumption is less than half of that, at 0.4%/min. Meanwhile, I started going through the list of important functionalities I wanted to make sure still work.
-
Desktop icons. My desktop buttons didn’t work, so I found this thread, where the proposed solution was to copy the firefox.desktop icon out of /usr/share/applications and just change the contents. I still haven’t figured out what makes firefox.desktop different from any other text file, but somehow right-clicking it gives an extra option to [Allow Launching] that isn’t available in my custom made .desktop files. I also found that .desktop files can no longer be launched from inside folders. However, between having the ability to launch desktop files from inside folders and having desktop icons snap to a grid, I would rather have the desktop icons snap to a grid, so I’ll live with it.
-
Hibernate. This still fully works, and xscreensaver is no longer necessary. Upon coming out of hibernate, I’m greeted with the new Unity login, so this is great! Sleep-then-hibernate still works too! Hooray!
-
Conda. I still remember a year ago, upgrading my Apple machine to Catalina broke my conda installation, and as a result, I had to do a fresh reinstall. Fortunately, the same didn’t happen here, conda was fully functional after the upgrade. The only environment that broke was
tf-gpu, on which I had installed opencv. Trying toimport cv2resulted in an import error. This was pretty trivial to fix, I simply recompiled opencv from source and it worked again. -
Ruby. I previously had ruby-2.5 and upgrading gave me ruby-2.7. When I tried to run
bundle exec jekyll serve, I got the following error:bash: /home/harrisonized/gems/bin/bundle: /usr/bin/ruby2.5: bad interpreter: No such file or directoryThe fix was pretty trivial:
gem update --systemandgem install jekyll bundlerdid the trick.
In conclusion, I’m pretty satisfied with the upgrade. Not only does the system feel newer and cleaner, it takes significantly less power and overall feels a lot less hacky. Everything still works as expected, and my computer feels a lot smoother than before.